Friday, May 21, 2010

For You Friday - Master Bedroom

Hey my wonderful readers and new friends.  Don't you love Fridays!  I sure do.  Today's For You Friday is all about making your bedroom a place to go for relaxation.  But before we get into that you know I've got some goodies for you right!!  I'm so excited to let you know that I'm sponsoring a great giveaway over at one of my all time favorite blogs, The Girl Creative.  I've gotten so many compliments on my blog layout and design and well folks this is the awesome and talented gal that did it up right for me so please go over there and tell her hi, hop on her New Friend Friday blog hop and enter to win $40 worth of goodies from my store Texas Monkey Boutique, and if that wasn't enough fun for you I've also included a discount code for you but you'll have to go HERE to find out what it is! 

Now if you're new here or stopping in from one of the awesome Friday Follow Blog Hops like New Friend Friday or Friday Follow with Trendy Tree House then let me tell you Friday's here are fun.  It's all about you and what's more fun that you?  Well maybe some giveaways, tips, things I think you will enjoy, advice, and more make it that much more fun.  I'd love to have you as a new follower but only if you are interested in crafts, DIY projects, humor, honesty, tutorials, and fun.  The only thing I request is to let me know why you've decided to follow me, that lets me know you read my posts, looked around and made a decision, not just clicked follow to add numbers, it also encourages me to come visit your blog, follow back and come back often.  I am wanting to develop friendships and more interested in relationships with my readers and not just numbers.  Deal?!  I've met a lot of wonderful gals through this blog and I look forward to featuring each of them soon.  Anyways on to For You Friday.

Master Bedrooms, our sanctuary, our cave, our escape goat from pressures and reality.  Your master bedroom should be a comfortable retreat where you can rest, relax and unwind after a busy “mommy” day. If the bedroom is well organized, it can become a haven and make it easier to enjoy the comforts of your room.

But let's face it, life is about living right and well sometimes living life can result in a room like mine, a cluttered room.  Bills are stacked up on the desk, the night stand becomes a catch all, laundry baskets with laundry to be put away hide in the corner, laundry baskets with dirty clothes screaming at me from all corners of the room, toys, shoes, a burnt out light bulb needing to be changed in the lamp, ribbon left out, oh you name it, my bedroom has it. A room like this can cause you to get very disoriented and stressed.   And I've been trying to figure out why is it my so called haven becomes the storage for items with no home, catch alls for clutter especially if I'm having company over and the last room to get cleaned or any focus on?  My theory is whether you're a working mom like myself or a SAHM like I dream to be one day, we are all managers of the home, meaning we take care of everyone else in the family leaving ourselves last, thus our sanctuary gets left out too.  Being a mom, a home maker, is a wonderful job, rewarding, humbling, exciting, and noble but taking care of ourselves needs to be a priority as well.  If we aren't taken care of, giving to ourselves, then how can we expect to have anything left to give to others? 


But by making just a few simple adjustments in our master room we can all achieve the AWWWW moment every time we step in that room.  Don't we all crave to have the one place where we can find solace with our spouse and some grownup time?
See the difference in the two pictures above, before and after.  (Note, this is not my bedroom but the before is a close resemblance with the clutter. :)
Clutter 
De clutter your room.  We all have clutter- books, papers, jewelry, pictures, etc.  If you don't love it or haven't used in the past few months then get rid of it, you won't miss it.

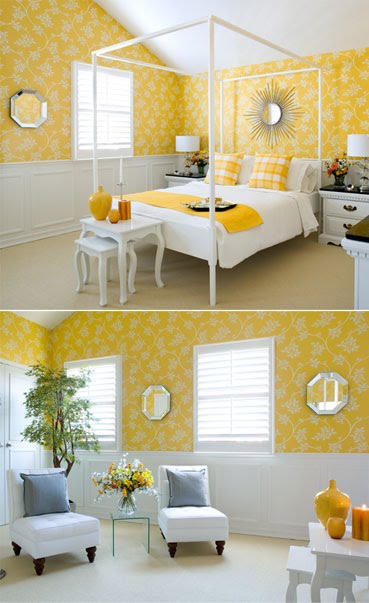
This is the picture I used for my guest room inspiration.
 
Storage:
Try not to use under the bed for storage.  If you must, use well labeled containers that fit and keep them as organized as possible.  Under the bed is a dust bunny magnet so if possible find other storage areas to use. If there are things, like makeup, that you use all the time, why not find a better way to store them such as a pretty basket. You can always find inexpensive and decorative organizers that will fit into most any décor.

I love this room, love the Kelly green.
 
Multi-purpose Room:
If you are like me you have a small house which fits us and our need but there isn't extra rooms to house an office or craft room so the bedroom becomes a multi-purpose room.  Keep your desk clutter free and clear of paper and mail as much as possible.  Use file organizers and trays to keep them out of sight.  Keep your crafting table or sewing table as clean and clutter free as possible, use shelves, organizers and bins to store your items and label them.  You want to do your best to make sure this secondary purpose of the room doesn't overwhelm the first which is to be a haven to you and/or your spouse. 
Check out the before and after desk area I found on google.

Before

After

Closets:
Use double rods, vacuum storage bags, shoe holders, hooks, and bins to help keep your closet organized.  Hang clean clothes and put dirty ones in a hamper.  Keeping things off the floor will do wonders for your closet. 

 
Beds:
Always make your beds.  It's amazing how making a bed in the morning will make a room look and feel so much more organized and cleaned.


15 Minute Clean Up:
Take 15 minutes and spruce up your room.
  1. Pick up all dirty clothes and put in the hamper
  2. Hang or put away clean clothes
  3. Vacuum or sweep and mop
  4. Throw away all trash that is laying around
  5. Grab a bag or basket and put all misplaced items in here to be put away later, IE: kid toys, hair brush, dog collar, etc.  Don't put them away now, just gather to be put away.
  6. Straighten surfaces like book shelves, lamp that is crooked, etc
  7. Make your bed

Making your bedroom a spa like atmosphere doesn't have to take big bucks or fancy decorations, it just takes a few minutes a day to keep it clean and organized.  Now come home light some candles and relax your day away.


Happy Friday Ya'll.


Thursday, May 20, 2010

Thursday's Tutorial - T-shirt Dress

Today's Tutorial is so stinking cute and although I wish I could say I did it, I can not.  It comes to us from Sumo's Sweet Stuff.  Have you been to her blog yet?  It is chalked full of well Sweet stuff like Tutorials, crafts, recipes, and more.  You must go by and tell her hi. 

She is going to show us how to make a t-shirt dress.  If you are around my age then you may remember wearing t-shirt dresses as a child and if you're like me the thought of that memory just scares the poo out of you, let's face it they weren't that cute, big hair, wacky fabric at the bottom and a wild colored t-shirt at top that probably had glitter fabric paint on it.  But this one is oh so precious that any little monkey would be excited to wear it. 
So Let's get started.
Here's what you need:
- t-shirt (mine was a $3.50 tank from Wal-Mart)
- fabric
- iron
- sewing machine/accessories
- buttons (optional)


You'll want to start off by using a dress your little girl already has for some measurements. For the body of the dress, you'll want to measure across the width, and then cut your width of fabric to be one and a half times that. As for the length, you'll just want to figure how long you want the dress to be, subtract how much shirt you are leaving, and there's your measurement for the length. If you are smart, use the fold of the fabric to cut this piece out. That saves you sewing a side. You can see that I was not smart.


For the ruffles, you'll want to make them as long as two times your width since you will be gathering them to make them ruffle. For the width, it just depends on how long your dress is going to be and how many different fabrics you are using. I needed five ruffles that would be about three and a half inches wide, so I cut them at four inches to account for seams. Again, use your fold! I got smart this time!


You'll want to pin the two right sides of your fabric for the body of the dress together and sew the seams. I used a 1/4" allowance.


Next I ironed a 1/4" on the bottom of the body and sewed it.


At the top of your body, do a gathering stitch by setting your stitch length to the longest length. Don't backstitch here! You'll need your thread ends nice and long so that you can pull.


After I did the body, I closed up one of the ruffles, ironed and hemmed it, and did the gathering stitch at the top. This was the ruffle I wanted to go first.


Next you are going to pin your ruffle, body, and half shirt together and sew a quarter inch seam.


Turn it right side out and top stitch.


Doesn't this look like a little 80's dress??


Then you're going to want to hem and gather all of your other ruffles. Here's a little pile of ruffles!


Then, measure the distance that you want between ruffles. Okay, I was living on the edge and just eyeballed it! Pin your ruffle down and sew it all the way around.


Then top stitch all the way around. Do this for all of your ruffles.


Looking good so far!


Then I decided that I wanted to put something on the sleeves of the tank. I traced a circle and cut it in half.


Then I ironed down the curved edge and sewed it....


And then did a gathering stitch to give it a bit of a ruffle.


Sew them on to the tank.


Make a cute flower and hand stitch it on.


Hand stitch on some buttons.


And you are done! A cute, unique dress!


I also made one out of a onesie for my baby.


Then put them on the cutest girls you know and admire your work!


How awesome are these?!  Please go tell her hi and browse around her blog and have fun making your own t-shirt dresses.

Happy Thursday Ya'll.

Wednesday, May 19, 2010

So Many Pretties

I haven't shared with any of you in a while some of my recent work from my store.  I don't blog about it too often so if you're a new follower then let me introduce you to Texas Monkey Boutique.  I am very proud of my store and what I make and sell and extremly honored to have such a great client base.  I am currently in 3 different brick and mortar stores, wholesaler to another online store, do craft shows, and have many word of mouth sales.  I opened my website store almost a year ago just so customers could have a place to go and get an idea of what I make and sell.  My online store does not show everything I do or have done but my facebook fanpage shows more.  I specialize in custom orders and designs so that's why you may not see everything online.  I enjoy a mom sending me pics of an outfit and asking me to match it up in a style we create together.  I prefer my bows to stand out from the crowd and most moms prefer their monkey's stand out in a crowd so it's a win win. 
Recently I dressed a wedding party's flower girls.  I don't have pictures of two of them yet which were done in hot pink and black but do have some pics of the other two. 

The daughter of the groom wore an invory tutu dress with big ivory flowers and satin straps.  Isn't she a beauty! 

Photobucket

Here's another little flower girl, this tutu was bright yellow with a yellow headband and yellow daisy flower clip.
Photobucket

The next few pics are proofs from the photographer of a precious monkey who does pageants and really needs bows to stand out and compliment her outfits.  I'd like to toot my own horn here and say that I had only computer pictures of the outfits to go off of and try to match and the mom said it was like the bows came with the outfits they matched so perfectly.


And here's just a few fun shots of the pageant monkey.


Be sure to become a fan as I post things there that you won't see on the website, like these awesome zebra print daisy flower clips.  I have regular and pink, how fun is that?!

Photobucket


Or adorable bow flip flops.  Match any outfit with flip flops and a hair bow!
                                   Photobucket

Also I'm sponsoring a giveaway at one of my all time favorite blogs so check back soon for the announcement on that. Maybe you will be the winner of some goodies from my store.


Thanks for letting showcase some of my recent work. I so enjoy doing it. Oh and did you know my readers receive discounts? Yep 10% off at all times, just enter in Friend at checkout time.

Happy Wednesday Ya'll.

Tuesday, May 18, 2010

Dear So and So

It's Dear So and So time, put out there what you wanted to say but didn't get to at the time.  I love these, it's such a stress release for me and I love reading yours, I've got some very funny readers!

Dear Mom of little boy that bites:
While I realize the biting is pretty common in older babies and toddlers and they usually grow out of it quickly and it's a form of expressing their frustration I do however think that it's up to you as the parent to work on this little issue at home.  My child has come home with bruises from being bit and although I get frustrated I don't get mad, not at the child or the school because I know they are working on it.  I wasn't mad at you either because I ASSUMED you were handling it at home.  Boy was I wrong, when Poppa and I witnessed you picking up your child and he leaning in and biting you on your neck and all you did was flinch and say ow, I was floored.  No wonder he keeps doing it, there are no instructions from you to not to.  You didn't tell him no, didn't tell him he hurt you, didn't ask him to stop let alone discipline him for it.  Perhaps you're approach is to not acknowledge it and hope it goes away if you don't give it any attention but if that's been your approach this whole time, might I suggest a different approach as this one does not seem to be working. 

Hoping your child grows out of it soon,
Monkey's Momma


Getting back finally to linking back with Post It Notes Tuesday with Supah!
So what's your Dear So and So this week? 
Happy Tuesday Ya'll.
Related Posts with Thumbnails

Copy and Paste Code